If you followed my previous posts and got as far as setting up a Terraform pipeline in Jenkins, a thought may have occurred to you at some point:
Isn’t there a better CI system than this?
Of course there are many different CI systems, each with their pros and cons, and which one you choose will depend on your own environment, workflow and application needs. Jenkins seems to be an unavoidable demon in a lot of infrastructure stacks, but in my humble opinion it’s a big ugly Java monolith, difficult to declaratively configure or scale, and its pipeline system seems to use Apache Groovy just to make the task more complex than necessary. But there’s no arguing that Jenkins is also powerful, infinitely configurable and adaptable…

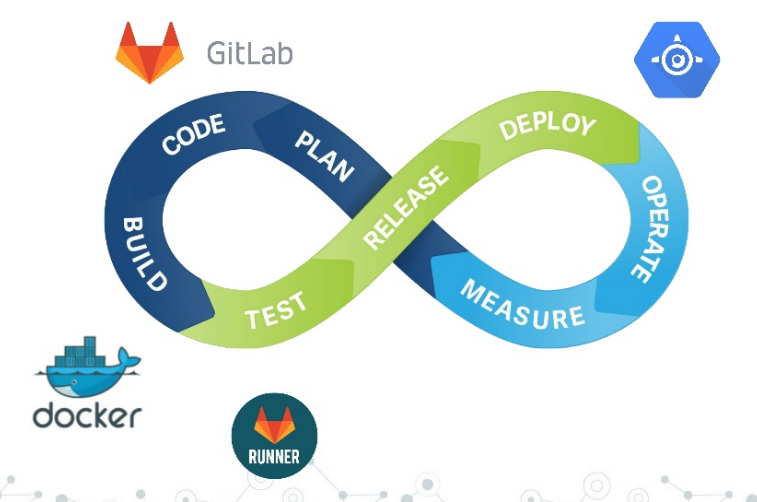
Thankfully if you’re lucky enough that your particular use case does not require the behemoth of Jenkins, you can use a more modern CI tool such as GitLab CI. First, a brief history.

What is GitLab? Link to heading
GitLab is a hosted Git service, much like GitHub. You may have heard of them recently since a certain acquisition and the #movingtogitlab movement. If you don’t like hosted services, GitLab also provide a standalone server that can be deployed on premises or in the cloud, and commendably most of the development of their server product is open source.
GitLab have been proponents of DevOps for a long time and bundle a ton of helpful tools into their product, including Kanban boards and a complete CI/CD system. You can even use GitLab for just the CI/CD features if your git repository lives elsewhere.
There are a few fundamental concepts for GitLab’s approach to CI, which make sense when you’re used to them, but may affect your decision to use it for your project:
- Every repo has a single pipeline configuration, declared in a
.gitlab-ci.ymlfile - Every commit to the repo will trigger a run of this pipeline
- That means no promping a user for variables (if you’re used to parameterized Jenkins jobs this may come as a shock)
Getting Started Link to heading
This tutorial assumes you have created a free account at gitlab.com, but you can follow alone with a standalone server as well. Create a new project, and add your SSH key for convenient git usage (GitLab will prompt you to do this).
Next, add some Terraform config to your repo. You can use the example files from my intro to Terraform post that build a basic GKE cluster. You will also need to set up remote state, which is detailed in my previous pipelines post.
This tutorial is really about GitLab pipelines in particular, so if you need any further details please go back and have a quick read through those posts. If you need a refresher on Git itself, take a look here.
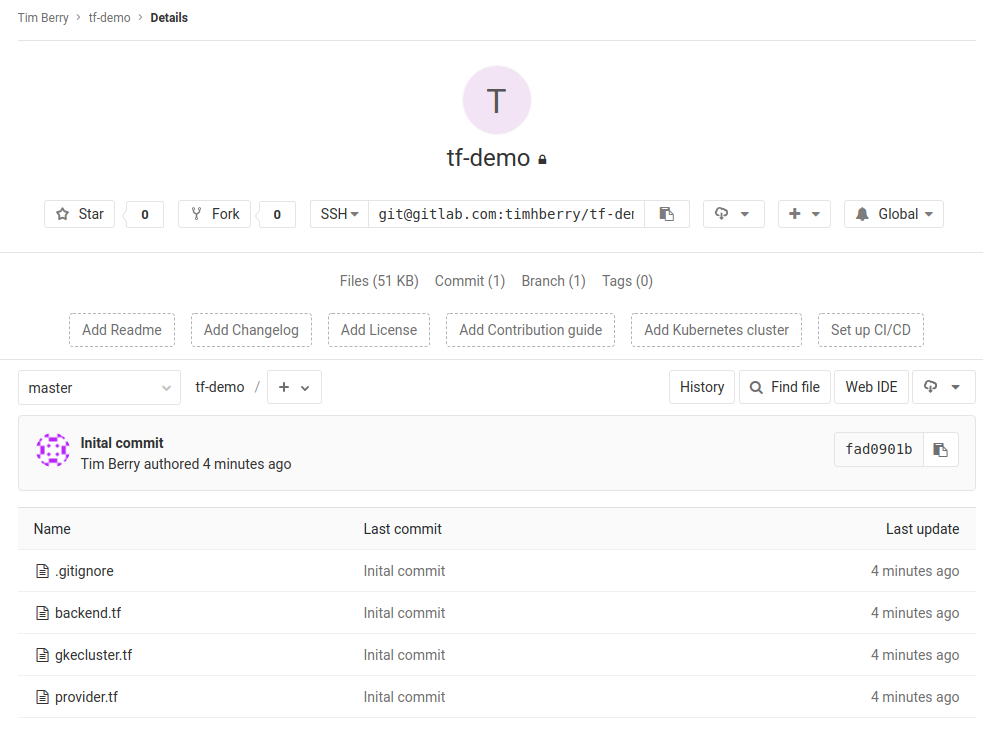
As we’re using public git repos here, make sure your working directory contains a .gitignore file that excludes the creds directory that you created (if you followed along exactly with the previous posts you’ve hopefully already done this). You do not want to commit your service account credentials to git! Finally, your local repo should look like this:
.gitignore
creds/serviceaccount.json
backend.tf
gkecluster.tf
provider.tf
You can now commit this code and push it to GitLab.
So far this is just a basic git repo. The magic happens when we add our .gitlab-ci.yml file. Simply adding this file configures and enables Continuous Integration for our project. When we commit the file, and on any subsequent commit, GitLab will run the pipeline for us. Add this file to your repo for a very basic Terraform pipeline, making sure you save it as .gitlab-ci.yml:
Note: If you don’t name this file .gitlab-ci.yml it won’t be used to configure a pipeline. Let’s walk through some highlights in this file:
image:
  name: hashicorp/terraform:light
GitLab runs pipelines in what it calls Runners. There are various ways to configure Runners, and one convenient option is to use ephemeral Docker containers. This is how Runners are configured for us when we use GitLab.com. This line of configuration specifies that our Runner container should use the terraform image provided by Hashicorp, as it contains the tools we need.
before_script:
  - rm -rf .terraform
  - terraform --version
  - mkdir -p ./creds
  - echo $SERVICEACCOUNT | base64 -d > ./creds/serviceaccount.json
  - terraform init
This section specifies a brief script that should run before any of our stages. We do some quick cleanup to make sure there are no local conflicting caches, then initialise Terraform, and print out its version number. You’ll notice here that we’re also invoking an environment variable to write our service account credentials file on the fly — more on that in a moment.
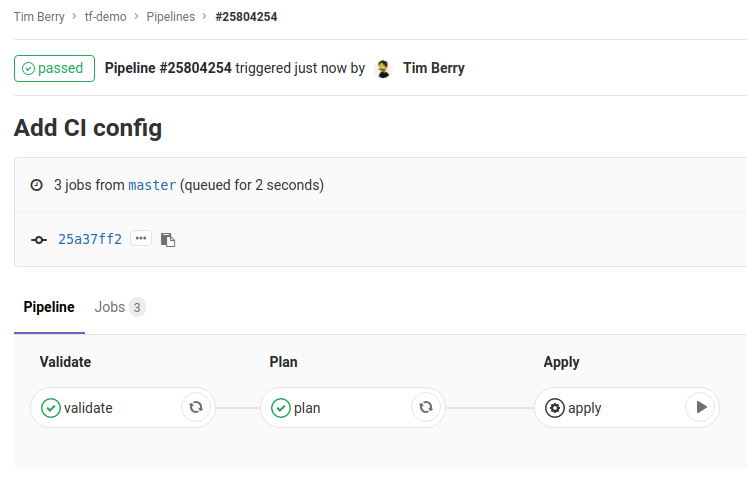
stages:
  - validate
  - plan
  - apply
Here we specify the stages of our pipeline. We want to validate our code, then plan and apply our changes. The following parts of the file just run the appropriate Terraform command to accomplish each of these tasks. One thing to note is this part of the plan stage:
artifacts:
  paths:
    - planfile
This preserves the file that terraform plan creates for terraform apply to use in the next stage.
Secret Variables Link to heading
When the Runner executes Terraform for us, it needs a way to authenticate with Google’s APIs, otherwise it won’t have permission to make any changes to our infrastructure. From previous posts, you should have a serviceaccount.json file that contains the required credentials. However, we don’t want to add this to our repository, or bake it into a Docker image. Don’t forget that if someone obtains this file, they will have permission to edit your project, add or delete resources, and potentially run up a huge bill.
Thankfully, there is a secure way to provide these credentials to our Runner when the pipeline executes. GitLab allows you to store variables and retrieve them from the runtime environment of the Runner. In the GitLab UI, navigate to Settings > CI/CD and expand the Variables section. We will create a SERVICEACCOUNT variable to match our pipeline configuration. The value of this variable must be a string, so we will encode our service account file:
base64 serviceaccount.json
Copy and paste the output of this command into the value of the variable and click Save Variable. GitLab has a concept of protected variables to limit their use to specific git branches, but that’s beyond the scope of this post.
You should consider rotating your service account keys, especially when entrusting them to a third party hosted service like this.
Run the Pipeline Link to heading
As soon as you push your commit to GitLab, go back to the web UI and select CI/CD > Pipelines for your project, and you’ll see that a pipeline is already running! Click the status of the pipeline to see the stages inside it, and you’ll see that each stage we defined is represented by a job. You can click on these jobs to see the output as the commands are executed inside the Docker container.
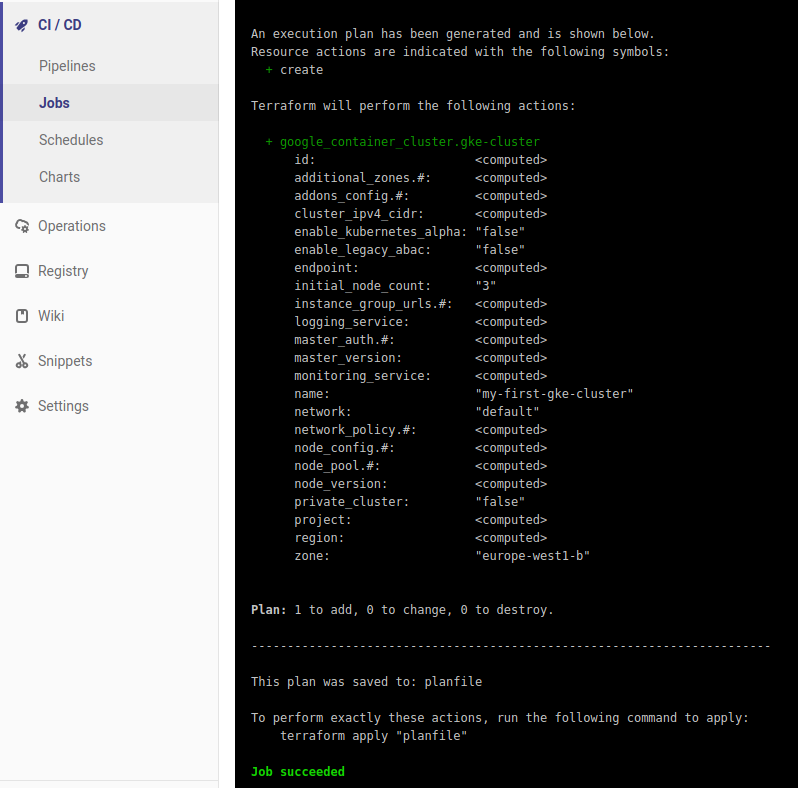
Ready to apply!
After a short while, the Validate and Plan jobs will complete, and the pipeline will pause because we specified that the Apply job should be manual. This will force GitLab to wait for you to manually start that job in the pipeline. This gives you a chance to explore the output of the Plan job and check that you’re happy with the changes Terraform is proposing.
Looks good to me!
Then you can click Play on the Apply job. As if by magic, the job will complete and you will have deployed a GKE cluster via a CI pipeline!

The completed pipeline in GitLab
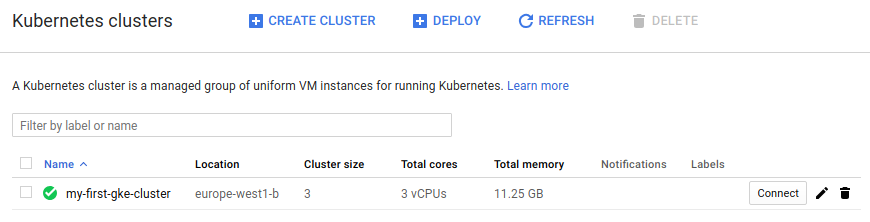
Our GKE cluster, declared in code and applied via CI!
You now have the basics of a working Terraform CI pipeline in GitLab. Any subsequent changes and commits to your repo will trigger this pipeline, and Terraform will automatically be planned for you — all you need to do is click Play on the Apply job to accept the changes.
At this point you may want to delete the GKE cluster you just created to avoid incurring charges.
What’s Next? Link to heading
There are of course more advanced ways to implement this pipeline, depending on your workflow. A common approach I use is to manage my infrastructure code with the Feature Branch workflow. In a nutshell:
- Changes to infrastructure code are made in new feature branches.
- The pipeline plans and stages changes to a development environment, because it knows that this is not the master branch.
- If I’m happy with the result of changes to the development environment I create a merge request (GitLab calls the Merge requests; GitHub calls them Pull Requests — they’re the same thing).
- Merges into Master get planned and staged to the staging environment, then await approval to make changes to the production environment, all as part of the same pipeline (ensuring environment parity).
- Feature branches are deleted once merged into Master.
- The master branch is protected, so you can’t push to it, thereby stopping anyone skipping the development environment.
If you think a full tutorial for setting up this advanced pipeline would be useful, please let me know. In the meantime, I would really recommend exploring what GitLab has to offer, and happy Terraforming!