Oh hi! This is a multi-part tutorial series, please make sure you reads the posts in order:
Part 0 - Part 1 - Part 2 - Part 3 - Part 4 - Part 5 - Part 6
Okay, to recap: We’ve successfully queried the API and stored the results in a struct. So how do we actually use this data to render a results page for our user? You’d think this would be one of the trickier stages of our tutorial, but it’s actually very simple.
As we saw in the previous step, we’re actually passing the entire dialog object - a slice of struct objects containing our search results - into our templating engine. All we need to do is update the template to display some results. Let’s start with the stylesheet first. Add the following on the end of style.css:
.container {
    width: 100%;
    max-width: 720px;
    margin: 0 auto;
    padding: 80px 20px 40px;
}

.search-results {
    list-style: none;
}

.dialog {
    display: flex;
    align-items: flex-start;
    margin-bottom: 30px;
    border: 1px solid var(--light-grey);
    padding: 15px;
    border-radius: 4px;
    justify-content: space-between;
}

.title {
    margin-bottom: 15px;
}

.description {
    color: var(--dark-grey);
    margin-bottom: 15px;
}
Next, we’ll add a block to our index.html page that renders our results in a list. This should go after </header> but before </main>:
<section class="container">
  <ul class="search-results">
    {{ range . }}
    <li class="dialog">
      <div>
        <h3 class="title">Episode: {{ .Episodename }}</h3>
        <p class="description">Line: "{{ .Text }}"</p>
      </div>
    </li>
    {{ end }}
  </ul>
</section>
Here we are using some more nifty features of Go templating. Using range we can iterate through all of the objects in the dialog variable that we passed to the template. Note that, as dialog is the object we passed, we simply refer to it as . (if we wanted to loop over an object inside dialog we could have used .OtherObject).
Once inside the {{ range }} loop, we can access each field of the struct, as you can see when we call {{ .Episodename }} and {{ .Text }}.
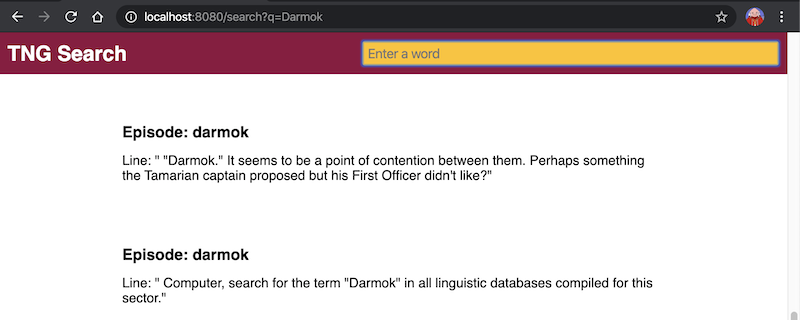
Save your changes, and start your app serving again with go run main.go. Now try a search term again and look! Results!
This is great, but we actually have a lot more info being passed to our template that we can display. Update index.html again to this:
<section class="container">
  <ul class="search-results">
    {{ range . }}
    <li class="dialog">
      <div>
        <h3 class="title">Episode: {{ .Episodename }}</h3>
        <p class="description">{{ .Who }}: <i>"{{ .Text }}"</i></p>
        <p>Act {{ .Act }} Scene {{ .Scenenumber }}</p>
        <p>Season {{ .Season }} Episode {{ .Episode }}</p>
      </div>
    </li>
    {{ end }}
  </ul>
</section>
Save your changes and run go run main.go again. Try a different search this time. I’m searching for “Lanel”, the alien doctor played by Bebe Neuwirth (Frasier’s ex-wife!):
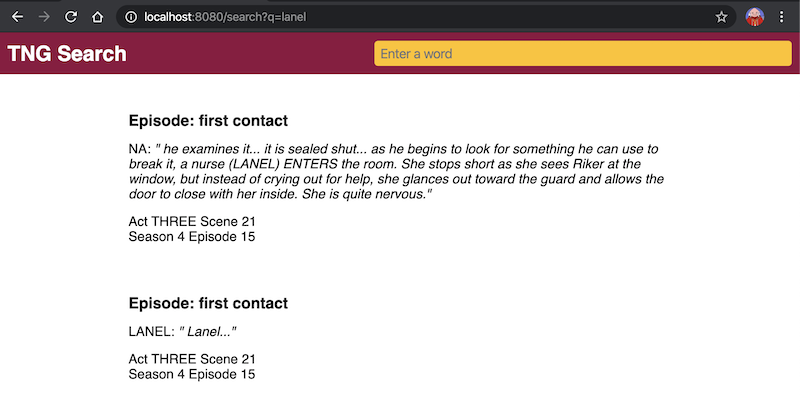
Now we get much more information rendered for our user. But at this point you may have noticed something about the API we’re querying. It will sometimes return stage direction as well as dialog. That’s why in the first result, the speaker appears to be “NA”. Thankfully, Go templates also contain some basic functions, like if that we can use to change the way we display results based on the results themselves.
Change the <p class="description">...</p> line in index.html to the following:
{{ if eq .Texttype "speech" }}
<p class="description">{{ .Who }}: <i>"{{ .Text }}"</i></p>
{{ else }}
<p class="description">{{ .Text }}</p>
{{ end }}
One of the fields in our struct is Texttype which will contain the word “speech” if it’s a spoken word of dialog. Using if and eq we can check if this is true, in which case we output who is speaking, and the line of dialog italicised. Then we use an else to render everything else without the speaker, because there won’t be one.
While we’re here, let’s add something to the .description definition in our style.css to make this look a bit more like a TV script:
font-family: "Courier New", Courier, monospace;
Now save everything and run go run main.go again.
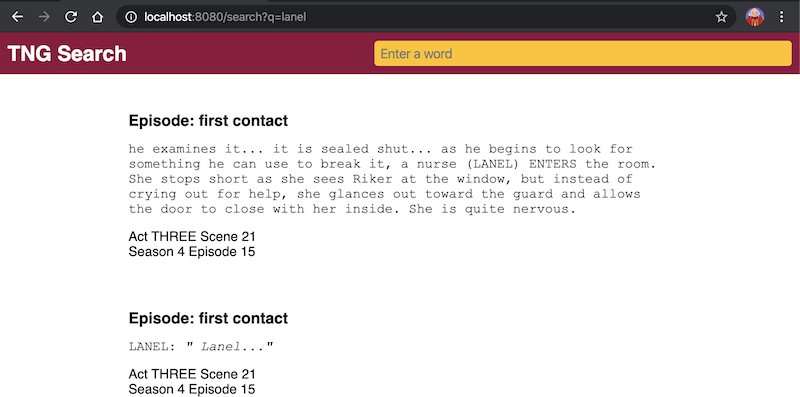
Looking good!
In this part we successfully used fields from our struct to render meaningful results to our users, and we used logical functions inside the template to change the formatting of results on a case-by-case basis. In part 6 we’ll add some final touches, including images, to make our app look really polished.
Here are the complete updated gists if you need to check them against yours: index.html and styles.css.