Updated December 2019 for Terraform v0.12 and Helm3!
If you followed my last post you now have a Google Kubernetes Cluster up and running in Google Cloud Platform ready to start orchestrating things for you. In this guide we’ll explore how we can interact with our new cluster and install the Jenkins CI tool to help us automate future deployments. We’ll cover a lot of ground here so I’ll link to some deep dives on the specific tools just in case you need to take a quick detour and brush up on anything.
gcloud + kubectl Link to heading
kubectl is the de facto command line tool for interacting with your Kubernetes cluster. If you’re already using the gcloud command line tool then it is likely that you have kubectl installed, but if not you can download it here. It can be configured to control multiples clusters, each within their own “context”. So to begin, we’ll use gcloud to authenticate with Kubernetes and create a context for our GKE cluster.
First let’s check on the cluster we created previously:
gcloud container clusters list
This should give you a list of any GKE clusters you have along with version information, status, number of nodes etc. Your output should look similar to this:
NAME                 LOCATION       MASTER_VERSION
my-first-gke-cluster europe-west1-b 1.8.10-gke.0
Our cluster looks good! If you don’t have a GKE cluster yet, just go back to the previous tutorial.
Let’s now use gcloud to set up the context for kubectl. You’ll need to specify the name of your cluster and its location:
gcloud container clusters get-credentials my-first-gke-cluster --zone=europe-west1-b
gcloud will tell you that it has generated a kubeconfig entry for kubectl. We can check that it works by querying the list of running pods in our cluster:
kubectl get pods --all-namespaces
Woah! There’s a bunch of stuff running already. Tools like kube-dns, heapster and fluentd are part of the managed services running on your GKE cluster. If this is your first time using kubectl or running things on a Kubernetes cluster, I’d recommend you take a quick break and follow this tutorial on the Kubernetes site. There’s no point me refactoring a great tutorial just to create yet another blog post! Instead, I’m skipping over the basics so we can concentrate on Helm and Jenkins.
Helm Link to heading
Hopefully you are familiar with the concepts of deployments, services and other Kubernetes objects and how they can be declared and instantiated on Kubernetes clusters. The Helm project started as a Kubernetes sub-project to provide a way to simplify complex applications by grouping together all of their necessary components, parameterising them and packaging them up into a single Helm “chart”. This is why Helm calls itself the package manager for Kubernetes. It has now reached a certain maturity and has been accepted by the Cloud Native Computing Foundation as an incubator project in its own right.

Helm charts abstract deployments, which abstract pods, which abstract containers, which abstract applications, which run on a hypervisor, which run on an operating system, which… look, here’s a turtle, okay?
To get started with Helm, download and install the latest binary from here.
Note that if you’re running MacOS Catalina you will need to temporarily disable GateKeeper and then allow Helm to run via your security preferences. You should re-enable GateKeeper as soon as you have done this. More info can be found in this article.
Older versions of Helm required a cluster-side component called Tiller, but thankfully that is no longer the case. So once you’ve got helm installed locally, you’re ready to go. You can check Helm is happy by running helm version. You should see some output like this:
version.BuildInfo{Version:"v3.0.2",
  GitCommit:"19e47ee3283ae98139d98460de796c1be1e3975f",
  GitTreeState:"clean", GoVersion:"go1.13.5"}
Jenkins Link to heading
Jenkins has been around a long time, and is essentially an automation server written in Java. It is commonly used for automating software builds and more recently can be found providing Continuous Integration services as well. In my personal opinion this tends to be because Jenkins is a “kitchen-sink”; in other words, you can pretty much do anything with it. This doesn’t mean it’s the best tool for the job, and I’m looking forward to evaluating some alternatives in future posts. One of my biggest gripes with Jenkins is that traditionally it has been a pain to automate its own installation, as its XML config doesn’t lend itself to being managed that easily. The Puppet module for Jenkins is buggy and out of date, and managing Jenkins plugins can land you in dependency hell.
Thankfully Helm has come to the rescue with a magic chart that takes most of the pain away from you. The Helm chart, along with hundres of others maintained by the community, can be found in the stable charts repository. So to start with, let’s add that repo to our Helm:
helm repo add stable https://kubernetes-charts.storage.googleapis.com/
Once we’ve done that, we can install Jenkins with a single easy command:
helm install stable/jenkins --generate-name
Helm will very quicly output some helpful instructions that guide you in accessing your newly deployed application, although in the background resources are still being created and it may take a few minutes before everything is up and running.
A deployed chart is called a release. At the top of the output you just saw will be the name of your release, which will look something like jenkins-1577873523. We’ll use this name to interact with our release in a moment. First, let’s check if Jenkins is ready with:
kubectl get pods
If your Jenkins Pod is in a READY state, you can follow the instructions Helm provided to you to get the auto-generated admin password, and port forward to the Jenkins service, which should then be available at http://127.0.0.1:8080.
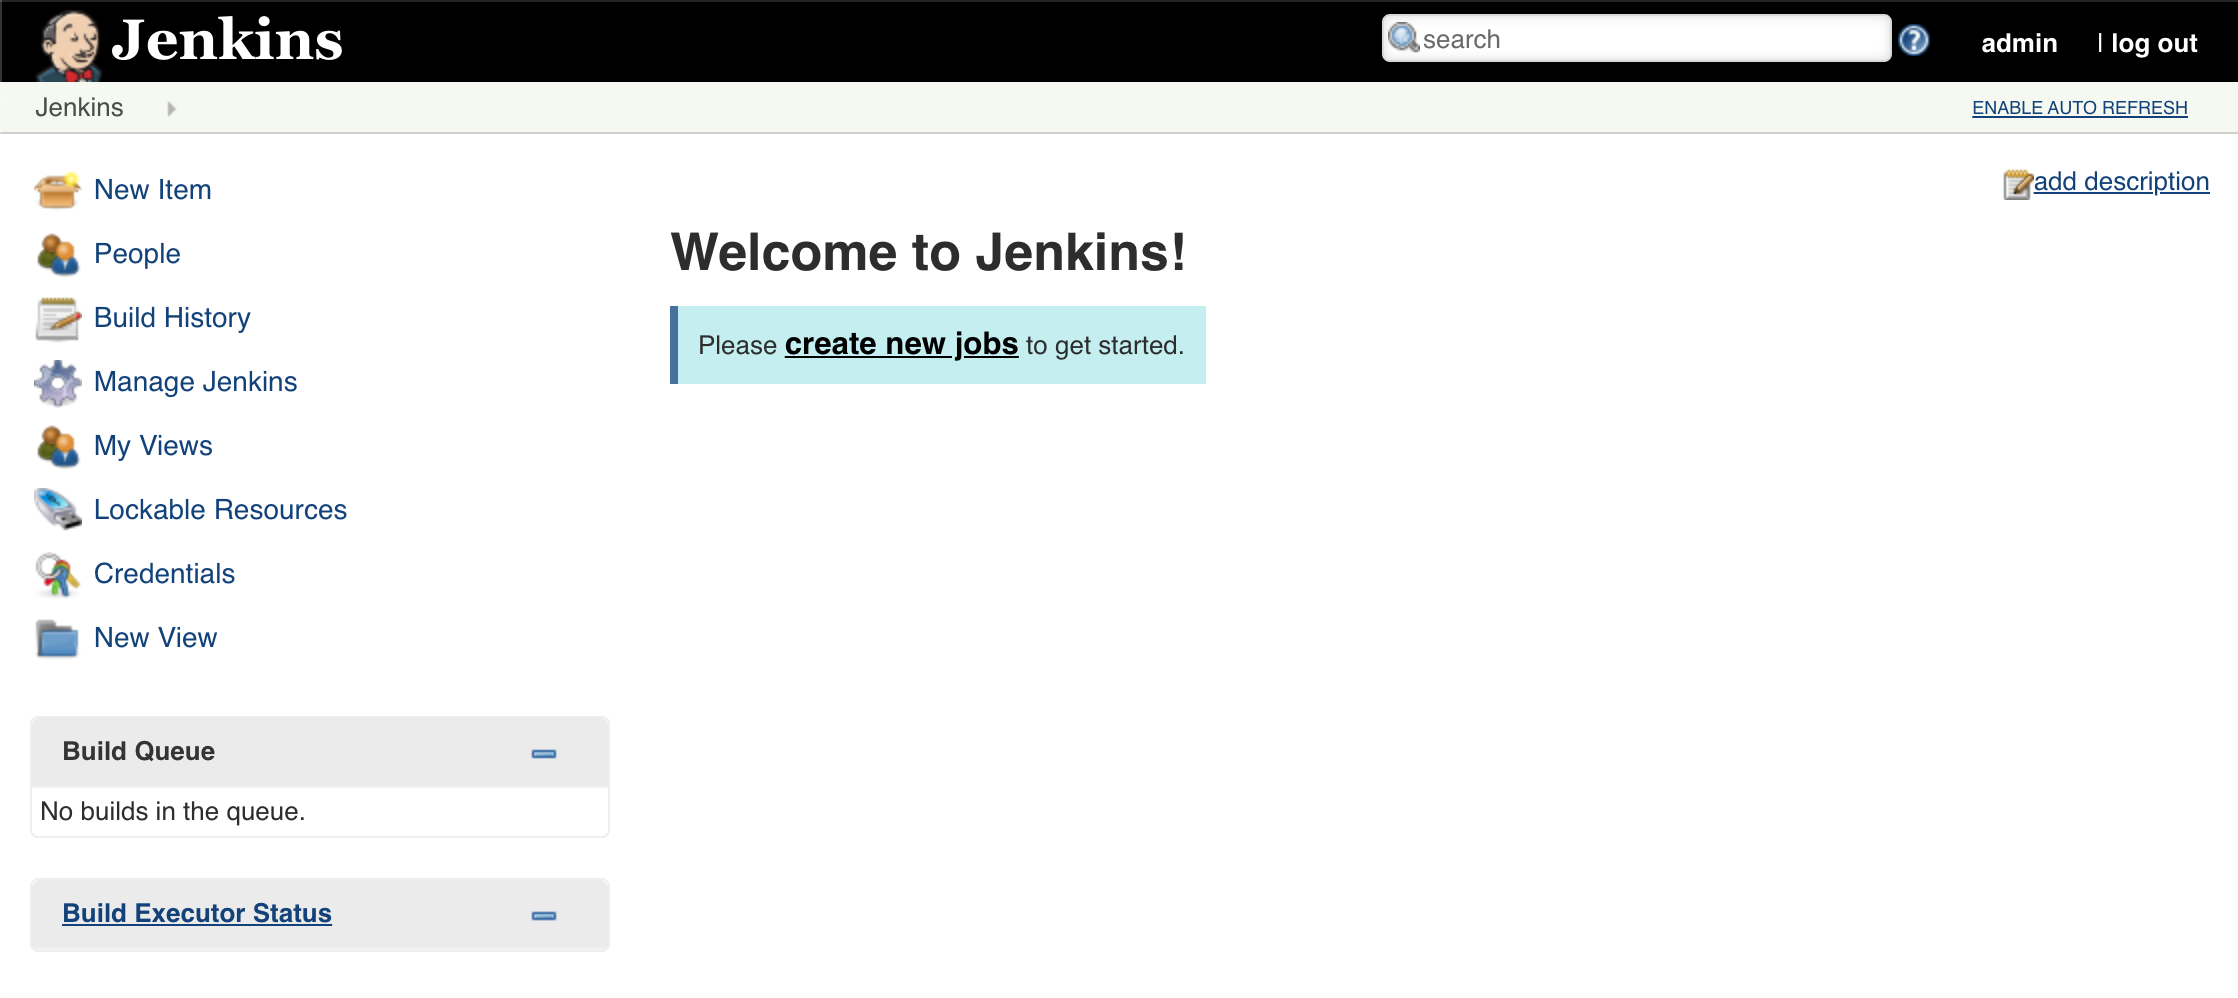
The Jenkins Dashboard
Helm Lifecycle Link to heading
Helm manages the lifecycle of its deployments, so you can manage your release with some simple commands (replace jenkins-1577873523 with the name of your release in these examples)
-
helm status jenkins-1577873523— Outputs some useful information about the deployed release. For Jenkins this will repeat the access instructions. -
helm list— Show all releases deployed to your cluster -
helm uninstall jenkins-1577873523— Deletes the release from your cluster and purges any of its resources (services, disks etc.) - don’t do this yet!
Most Helm charts make use of a parameters file to define the attributes of a deployment, such as docker image names, resources to assign, node selectors and so forth. We didn’t specify a parameters file in the above example, so we just inherited the default one from the published Jenkins chart.
Sometimes its usueful to provide your own values. We can inspect the configurable parameters of a chart in a repo with:
helm show values stable/jenkins
Browsing through this output will give you an idea of the kind of resources the chart is creating, and how they can be customised. We can also query Helm to show us any user-defined values for a specific release (substitute your release name here):
helm get values jenkins-1577873523
This command will show us that we have no user-supplied values.
Let’s override some of the defaults we got from the Jenkins chart. We can do this by creating a YAML file containing only the parameters we want to change. In this case we’ll change the master service type from ClusterIP to LoadBalancer, and add some additional plugins. Create the following custom.yaml file:
We can now apply our change by performing and upgrade to our release while specifying our custom values file. Remember to use the name of your release:
helm upgrade -f custom.yaml jenkins-1577873523 stable/jenkins
Helm provides some helpful access instructions again but note that they’ve changed now: It’s telling us to wait a few minutes for our external load balancer IP to be available. It’s also creating a new Jenkins pod for us that will contain the additional plugins we asked for. In the meantime, you can run helm get values again with the name of your release to confirm the user-supplied values that are now being used.
Once the new pod is ready and your external load balancer IP is available, follow the access instructions again to get to your Jenkins dashboard. Note that the admin password will have changed because a new pod was created. You should now see a link to the Blue Ocean plugin on the dashboard, which takes you to the slightly more modern version of Jenkins:
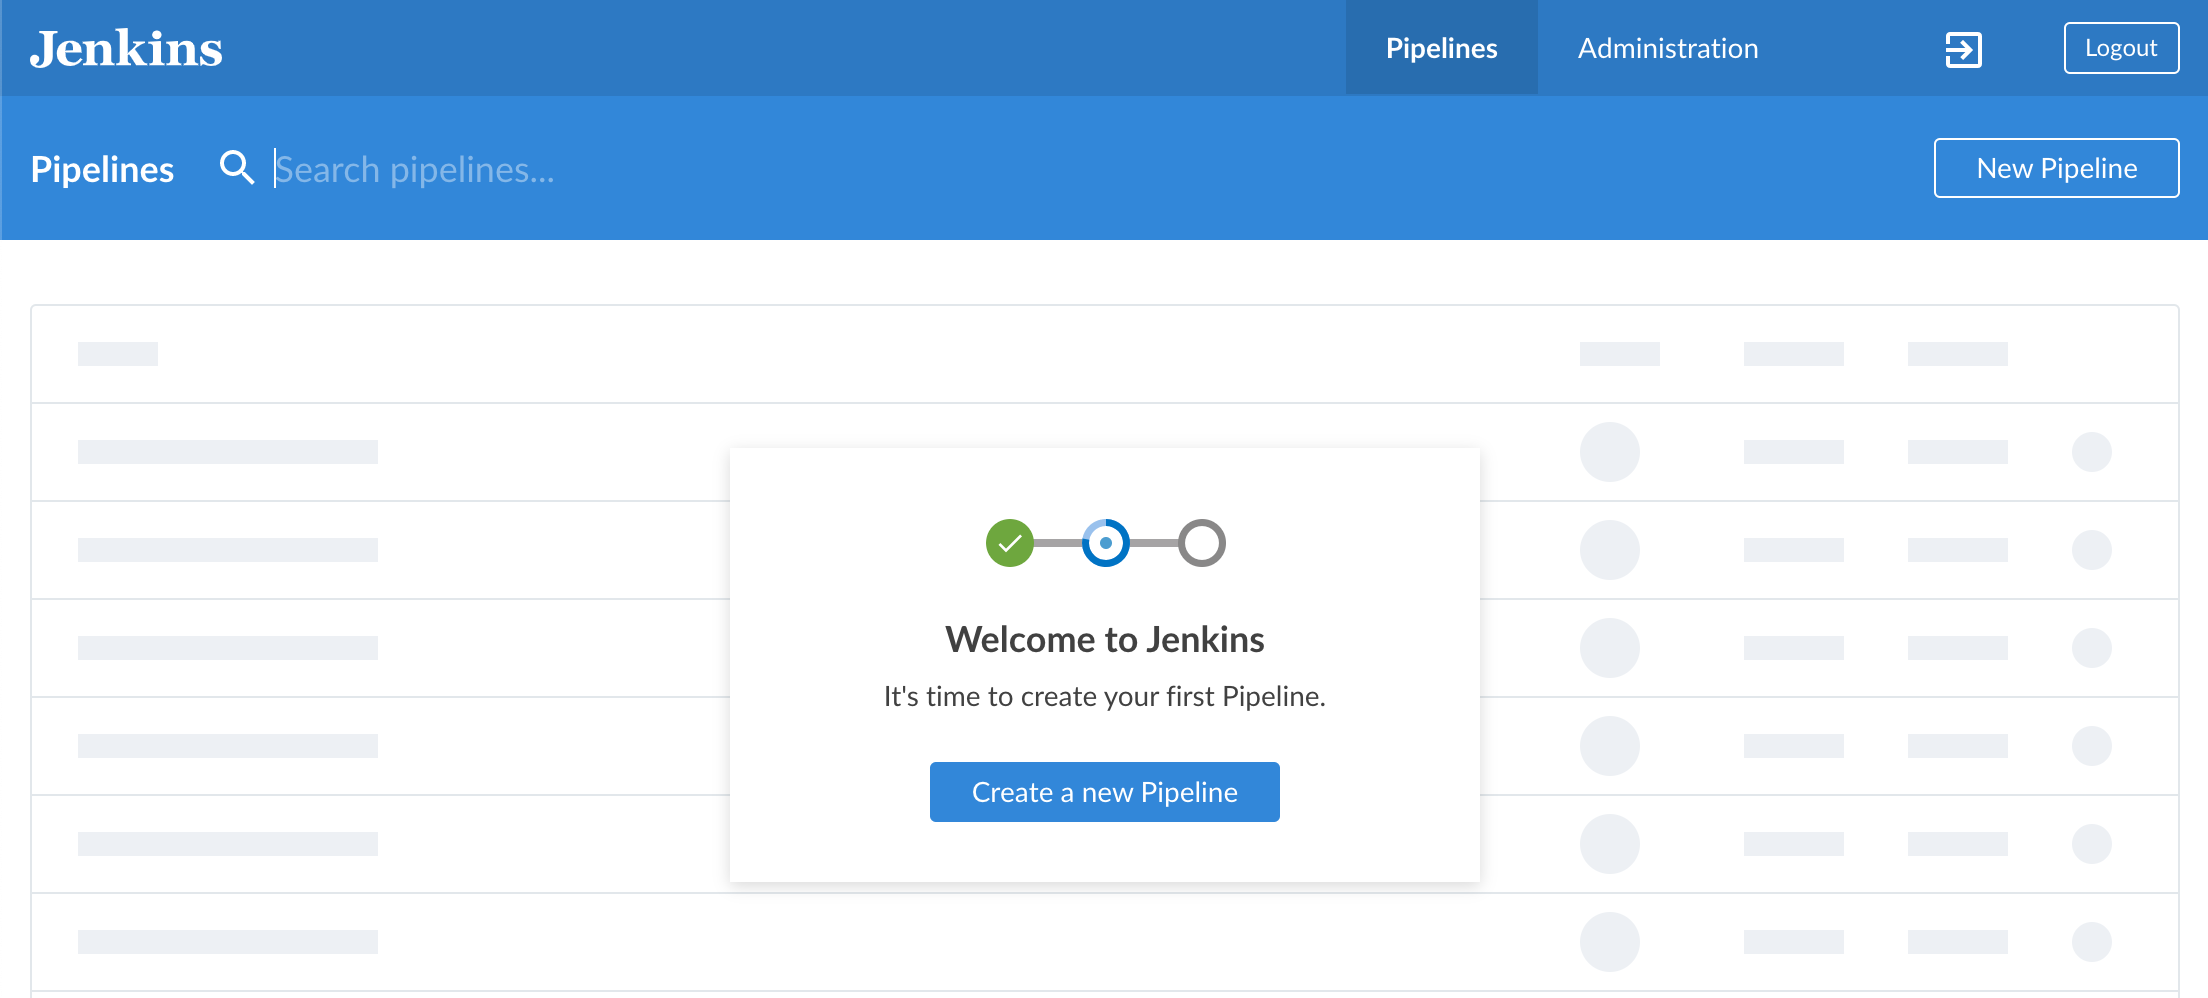
All the cool kids are doing pipelines!
I have to give credit where it’s due to the Jenkins team who have updated their Helm chart significantly from when I first wrote this tutorial in 2018. There is no longer any dependency hell, and with just these simple steps we are ready to start some continuous integration and deployment.
We’ll use Jenkins on GKE in subsequent tutorials, but unless you’re going straight on to them now, don’t forget to delete any unwanted resources so that you don’t incur any costs.